So this week I went for a little look in my local 99p store, to see if there were any bargains to be had.
Usually I tend to get some great hair products, but this time something else caught my eye.
I've been looking for a bb cream or tinted moisturiser for a while, but could never find anything light enough, or if I did, then it was out of my price range.
I happened to spot the Witch anti-blemish tinted moisturiser when browsing, and for 99p I figured that I may as well give it a go. It's formulated for those like me with oily or combination skin, and comes in 3 shades. Light, Medium & Dark.
For those of you that can't find it in your local 99p store, you can grab it on amazon.
I picked light 01 shade which looks like this.
(Stock photo)
I tend to use the Witch face wipes as they tend to deal with my problem skin quite well, so with this in mind I picked it up, though ever the sceptic, I had my doubts.
When I first opened the bottle and put some on the back of my hand, it looked pretty dark.
This prompted my usual thoughts of "ahh another bb cream/tinted moisturiser that claims to be light, but I end up looking orange anyway." but never-the-less, I figured that if anything, I could laugh if I ended up looking much like David Dickinson!
When applying it, I found that it blended pretty ok - it wasn't thick or heavy, which is a plus for my oily skin.
My fears for becoming orange were completely washed away upon blending it onto my face, as I found that despite being dark in the bottle, it blended really light and disappeared into my skin quite well to give a light/medium coverage.
Like the bottle claims, it does mattify the skin well, and it lasted the whole day which was a major plus.
The only things that I wasn't too fond of, is that my skin felt a little tight initially once it had set on my face - I think that may come from the antibacterial properties mind you. It's not terribly moisturising either, it is really more of a light moisturiser, which for me right now is ok.
I like to apply a little powder over the top to give it a little extra staying power, due to my skin right now.
At the moment, I've only been wearing it for a few days, so can't fully comment on just how anti-blemish it is, but it's looking pretty promising so far!
Verdict: I'm pretty happy to wear this at the moment as an alternative to having to wear foundation, as it's a lot lighter and nice & easy to apply, especially if you're in a rush leaving the house in the mornings (like me). With a 99p price tag in my local store, it's a pretty good bargain if you're looking for something lighter.
Following on from my review on the w7 In the Nude palette, I thought I'd share a mini makeup haul that I treated myself to - all super budget friendly, so Ladies (and Gents) that means you won't have to worry about spending all your wages on products!
I'm going to use stock photos here for the most part, as my photo taking skills are questionable at best...so let's start!
Firstly, as I'm in Scotland, I decided to take a little trip to my local Watt Brothers store.
For those of you unfamiliar to Watt Brothers - it's a chain of stores up here that offer great products at amazing discounted prices, from makeup, to homeware, clothing etc.
Their makeup section offers products for a range of brands eg. budget brands such a w7, technic etc all the way up to YSL, CK etc.
For this mini haul, I focused on the already budget friendly brands, though with an extra discounted
price!
First up: w7 Light Diffusing Concealer!
Watt Brothers price: £2.99 w7 Website price: £4.95 This is essentially the budget version of YSL Touche Eclat concealer, but without the £25 price tag. (though Watt Brothers has it in stock for around £20)
A handy twist pen design, for easy application. (though I put this on the back on my hand then apply with a brush)
This is a light, smooth concealer that reflects light to illuminate your face, and banishes dark under eye areas.
I tested this out last week for the first time, after previously trying the YSL version a while back - but there's no way I could justify the price tag.
I suffer from pretty dark under eye circles, and found that the w7, budget version to be just as good for making those circles disappear!
For me, I'd also use this as a light highlighter, as it has a lovely dewy effect and isn't as thick & heavy as the concealer I usually wear.
It's absolutely perfect for day to day wear as well, as it doesn't weigh you down.
With a pocket friendly price of £2.99, I've definitely been converted.
Next up: w7 Super Brows pencil
Watt Brothers price: £0.99 You can find this online for £1.99- £2.99 roughly.
I'd been searching for a new brow pencil to match my 2015 brown haired look, and came across this on my mini haul trip.
This comes in a couple of shades, and is a soft eyebrow pencil at one side, with a handy brow brush at the other.
What I found with this, on first application, is that it is a soft pencil, and goes on pretty strong. However, you only need a small amount of this, as the super handy brush will blend the pencil along your brows, whilst keeping them in shape.
It may take a little bit to get used to, but I'm pretty happy with this, especially given that it cost me just shy of £1.
It lasts pretty well, and I didn't find any smudging or melting during the course of the day, but then again I don't tend to wear anything apart from my fringe near my brows and don't tend to rub. If you find that you could rub it with hats, or are subject to a lot of heat, then you can easily a thin layer of eyeshadow over the top to give it some extra hold.
As you only need a little bit at a time, it's great value for money since it's also a pretty long pencil!
My only disappointment, is that it doesn't come in many shades, so it's more suited to brunettes/dark haired beauties. (unless of course you're into rocking light/bright hair and dark brows!)
Technic Fruity Lip Gloss
Watt Brothers price: £1.99 Online price: I found it on lovethymakeup.com for £1.49, though you have a £2.50 delivery charge, so will have to leave it until you've got a list on things you'd like to make it worth your while ordering from here.
I'm usually quite apprehensive with lip glosses, and tend to try out a good few, as I've found a couple of cheaper brands that can be pretty sticky.
However, this one definitely isn't sticky at all. This is a lovely sparkly gloss, that comes in a variety of shades and has a brush pen applicator. (Once again, I tend to put this on the back of my hand, then apply with a lip brush)
This gloss goes on quite nicely, and doesn't smell or taste bad (I'm guilty of licking my lip/hanging my tongue out when I'm concentrating >.<) and gives a nice, girly, plumped up look without being "in your face".
I like to use glosses over a nude lip, for a subtle, glossy, almost English rose effect, or over the top of a matt coloured lipstick to give it some extra oomph!
Royal False Nails:
Watt brothers price: £2.99 Online price is about the same if you are willing to look around.
This is a bit of a wildcard, in terms of buying the exact same set from Watt Brothers.
I find that they tend to stock a variety of different Royal false nails, and only tend to have a few of each. Every time I pop in, there are always different styles in, so trying to track down the same set twice may require some online hunting!
I use Royal nails quite a lot, and they usually come in some really cute and interesting designs. I had the Mirrorball versions last year, which I really liked too.
They come in a good array of sizes within the pack, which is handy since I have pretty dainty hands and nails. The nail glue that comes with it is also pretty hard wearing, even for someone like me that's quite active.
I picked up these particular ones, as I think they'd be a great base for Hime Gyaru style nails, due to the lovely pink colour and little 3D flower design. When I get round to wearing them, I'll be adding some cute crystals and other nail attachments (can't think of the proper term for this) to create a really standout set of nails.
Here's a couple of photographs of other products that I found in my local Watt Brothers and tend to purchase a lot from them: To see the images bigger, right click and select "open link in new tab/window)
The Technic lashes are also pretty good, they're not too thick on the lash band, and have a good curl so they don't sit flat on your eyes.
I usually swear by Maybelline Colossal Mascara (I've been trying out other brands lately but always go back to Maybelline) usually in other stores they retail at about £8, or there abouts, but Watt Brothers sell them for £4.99, which is a great bargain! I love the length, curl and deep black of Maybellines' Colossal Mascara, and I don't find that it clumps at all which is a major plus.
On the right, you can see the pretty good range of brushes that they stock, though I only took a snapshot of the Royal ones, as these are the ones I buy the most of - look at those prices! Really good bargain for some good quality brushes that do last!
After I left Watt Brothers, I remembered that I was running out of my staple powder and liquid liner. Off to Superdrug I went!
2True Liquid Liner:
Superdrug Price: £1.99 or 3 products for £5
This is my go-to liquid liner! I'm not a massive fan of gel liners, or more brush like liners, as I don't feel I can get as sharp a line as I'd like to with them. (That's personal taste, mind you. Gel liners I find to be more hygienic when you're applying makeup to others instead of just yourself. )
I absolutely adore this liner! It goes on a rich black, dries in no time at all, and lasts the whole day through! The applicator is sturdy and has a good thin tip to allow for fine lines and flicks, which is my daily liner look. Having used a few liquid liners before I discovered 2True, I find that the applicator stays sharp/maintains it's tip for longer than the others I've tried, usually for the length of time it takes me to get through the liner. (previously I tried Collection 2000 & w7 liners, but was never a big fan of either of them for various reasons.)
2True Matt Pressed Powder:
Superdrug Price: £1.99 or 3 products for £5
This is another staple in my makeup kit. This powder is great value for money, comes in the paler shades that I tend to like, and is pretty good wearing for me, despite being under studio lights and having really oily skin in places such as my nose/forehead. 2True White Eyeliner Pencil
Superdrug price: £1.99 or 3 for £5
Once again, 2True at Superdrug tends to more often that not have a 3 product for £5 deal, across a good range of different products so you can get a good combination of products for a budget friendly price.
This is the first time I've used the White liner from 2True, as I've usually bought the slightly cheaper version from MUA at £1.
In saying that, I've always liked the Black liner pencil that 2True has, and the white didn't disappoint me!
Although slightly more expensive that the MUA version (which is also pretty good for the price), it goes on a lot easier and stronger in colour, which means just a simple quick glide on and you're ready to go! A liner that I do tend to use a lot of for adding extra definition under my brows, and for making my eyes look a little bigger.
That was my mini budget friendly product haul!
I really hope is helpful to a lot of you, especially to those who ask and are curious to know which products I buy, and where from! ^_^
Please let me know your thoughts, or any questions in the comments below, and please remember to subscribe to keep up to date with my posts!
I hope you enjoyed my last post! If you tried out the look for yourself, then I'd love to see a picture of you! ^_^ This weeks' post is going to be a little review! I'm a massive advocate of 'Beauty on a Budget' for a couple of reasons.
The first reason, is that I don't think it's necessary to have expensive products or equipment to create high quality makeup looks. Budget brands can be absolutely wonderful if you're prepared to try them out and find what you like.
Secondly, I simply can't afford to splash out on high end brands.
Sorry, but you won't find any products that cost over £15 (Usually they'll all be under £10, though I have 1 or 2 small exceptions) or any fancy Boeing 747 brushes that you *need* for your makeup looks!
This week's post will be about the w7 In the Nude palette.
My lovely friend bought me the w7 In the Nude eyeshadow palette for my Birthday last month. It was really great timing as I'd been looking for a new neutral palette for my more subdued looks.
Here is what it looks like:
This Palette retails from w7 Cosmetics at £9.99, but if you're in Scotland, Watt Brothers sell it for £4.99!
First impressions:
This is pretty much a Budget friendly version of Urban Decays' 'Naked' eyeshadow palette.
It comes in a nice tin, with 12 shadows, and a makeup brush/spongetip applicator.
This is how the shadows look on my skin with only a little bit being applied quickly on my arm in natural light:
From the hand/arm test alone, I noticed that the shadows are all pretty strong, which is a really good thing in my opinion, as with some brands you need to keep layering to actually see the shadow. (Remember those makeup kits you used to get for Xmas?)
Despite being pressed shadows, they are actually quite soft so they come onto your brushes very easily - another good thing.
I also found that due to both of these things, they are really easy to blend, and those that know me, know how much I like to blend!
The palette has a combination of matt and shimmery/metallic shades, mostly learning towards the metallic/shimmery shades. The 2nd colour on the palette is a dusky rose shade, with a lot of shimmer to it (although you can't really see it in my photos) and I really love this. It twinkles really nicely when it catches the light, which for me is another plus - I love to sparkle!
For me, I think this palette is pretty great, especially for just shy of £10 (or a fiver if you're getting it from Watt Brothers)!
The downside:
The Brush/Applicator.
I have to be honest from the start here. I absolutely hate sponge tip applicators. They don't really allow for blending, more eyeshadow sits in the applicator that goes on your eye, cleaning them is also a pain & if you don't, they blend the shadows in the palette together.
Really, I think sponge tip applicators shouldn't be used full stop.
It does also come with a brush, for those of us that don't like sponge applicators (like me).
Unfortunately the brush is made of bendy, synthetic fibres that only really move the eyeshadow in the palette, and is pretty useless for general use.
Really, I wouldn't recommend using it at all.
I actually got most of my makeup brushes from Lidl a while back when they had some in and they've served me pretty well. Now that I'm updating my brush kit, I'm buying mine from Watt Brothers discount store(Scotland) and they tend to be from Royal, and are costing me £1.99 each approximately. I think my foundation brush was a bit more, £2.99 if I remember correctly!
I really do like this palette, the shadows go on well and come in lovely shades which are perfect for more natural everyday looks, or smokey eyes etc, but the possibilities are endless!
For £9.99 it's really a great bargain and I would recommend it if you're looking for an easy to carry set that won't break the bank.
I mentioned at the bottom of my last post (congrats if you managed to make it through!) that I am going to do a tutorial for the simple & sweet gyaru makeup that has kick started my 2015 style.
When it comes to Gyaru, for me it's all about the eyes. Circle lenses and lashes are an absolute must, but there's absolutely no need to break the bank for this! (I'm wearing Princess Mimi lenses in Sesame Grey that I won from www.pinkyparadise.com)
This is a pretty simple tutorial for me, however you'll get to see me go from bare faced & drab to socially acceptable. Please bare in mind that I'm not that comfortable seeing myself on camera without inch thick makeup so it's quite a thing for me!
I'm going to give you a video tutorial with annotations, and then I'm going to talk about products a little bit! This was the first time that I've used my camera & studio lights for a video tutorial, so I'm still trying to work around the colour cast (which makes my hair looks blue/green even though it most definitely isn't!Also having the lights up at my face has made my body seem more tanned than it is - rest assured, I'm all one colour!) and trying to get a good set up in my flat, so please excuse any lighting mishaps!
Here is the look:
Here is the video tutorial:
(for better quality, please watch on youtube & subscribe to my new channel! ^_^ )
Ok, so let's talk products! Base:
Etude House CC Cream in Glow
I was given this as a gift from my BFs sister when she came over from Hong Kong as I really wanted to try out CC creams, but couldn't find anything that I liked the look of in the UK that wasn't going to cost a fortune!
I've used this as a base, as I really love the fresh glow it gives. It also gives a pretty good base to apply foundation over, and it's built in lightener works well for the pale look that I like.
Foundation:
I'm using Max Factor Colour adapt in shades 40 (creamy ivory) and 55 (Blushing Beige).
I usually wear my makeup a lot heavier than most people, as I'm that used to having to pile it on for photoshoots, so this is a nice thick foundation that gives really good coverage. I'm using 2 foundation shades to start my facial contouring process.
In Gyaru makeup, having a strong contoured face definitely completes the look. You want to slim down your nose and give your face definition - which you'll see me do in the video.
Concealer;
2True Cover 'n' Conceal in shade 1.
Again, this is quite a heavy stick concealer, which works well for camera ready makeup. (Studio lights and flash has a nasty habit of bleaching out makeup, so you need to really layer it on for these occasions) I use this in place of a 3rd, lighter, foundation, as it's lighter than my normal one - so I use this to add highlights to my face. It blends out really well for me, and covers what I need to cover.
Powders:
Generally, I use 2 powders. I first do a general cover in a normal, ivory pressed powder. In this case, I'm using 2true pressed powder from Superdrug for my general coverage.
Then I go over and strengthen contouring with a darker pressed powder. This time round, I'm using MUA bronzer in shade 1, I think. I'll use a darker powder if I want a really, super harsh contouring effect, but I use this one in day to day life as it's not too harsh and warms my skin tone up after all the super light foundation. (You can also use a matt brown eyeshadow for contouring, which I also do.)
Blush:
W7 'The cheek of it' pink blush, which I got from Watt Brothers but you can get this from Amazon. Really inexpensive, but super pigmented and blends well - amazing value for money since a little goes a long way!
Highlighter:
Using a w7 highlighter powder here, to add a lovely glow. This one is a lovely shimmery pink colour, and reflects really well. I use it to bring out my cheekbones, bridge of nose and cupids bow. I do like to add a little to my chin and forehead, though you have to be careful with this or else you'll look greasy.
Eyeshadow:
Again, another w7 product: In the nude palette. (This was a Birthday gift from a friend)
It's pretty much a far cheaper alternative to Urban Decays' Naked Palette, but it doesn't scrimp on quality. Goes on really well and blends perfectly. I will do a full review on this soon as I love it so much.
I like to use around 4 shades of eyeshadow for this type of look, despite it being pretty subtle! I know it sounds a lot, but I like to build up layers and dimension.
Eyebrows:
There are so many ways to fill in your brows, all depending on what look you're going for! I've just used one of the colours from the w7 palette on an angled brush to fill and define my brows as it's the simplest, and usually most effective way to go about it.
If I want to make them stronger, then I may wet the shadow and use it as a liner although in this case, I want them to remain rather natural.
Liquid liner:
2True black liquid liner from Superdrug. I much prefer liquid liner, as it goes on pitch black, and has a nice sharp applicator that's easy for me to use to create defined eye looks.
Usually you can get 3 for £5 deals on 2True products, and they're definitely worth using!
Under Eye Highlights:
I have to confess, I absolutely LOVE the Crystal Tear Liner from Etude House. I had this and some other products brought back from a friend that was studying in Korea.
This is very similar in colour to my w7 powder highlighter, except that it's a liquid and a lot more reflective/shimmery. I use this to brighten up the inner corners of my eyes, and in this look, I used it underneath my eye to make them look puffier and bigger due to the reflecting qualities.
It also looks super cute!
Mascara:
For me, Maybelline mascara always wins, hands down. this time around, I'm using their smokey eye mascara. Goes on really black, and does create a lovely look. In this case, I'm onto using a little here so that my lashes will blend in with the falsies.
Lashes:Ok, for Gyaru looks, lashes are an absolute MUST. Without it, you're not really going to look Gyaru at all.
Usually you see everyone wearing Diamond Lash, Dolly Wink etc, which are lovely and Gyaru type brands from Japan, but I genuinely can't afford to buy these, especially at the rate I chew through lashes.
For this look, I bought some cheap lashes from Savers, which cost me I think £3 for 2 sets from Nlashes, and the ordered a box of 10 pairs of bottom lashes from Ebay (coming from Taiwan) -Under £5 for the box.
For me, these work really well and are very easy to use.
As a western girl, I tend to have pretty long bottom lashes, so I like to use bottom lashes that are more defined and thick so that you can actually notice them. I've extended them past my natural eye line, and also placed them slightly lower down to make my eyes appear larger, without going totally overboard.
Lips:Another wonderful product from Etude House - Juicey pop Tube in their Pink shade. I went for this as I really love the high gloss look, and it's not sticky or heavy on your lips at all. It's not a really strong colour either, so it allows for your eyes to do the talking!
Wow, I really didn't think I'd write this much if I'm honest!
Hopefully this, more in depth product list (compared to my usual list at the end of videos) is quite helpful to you.
I very much believe in Beauty on a Budget, so I will also do a post on how much I actually spend on products! Usually I don't like spending over £5 on a single product, unless it's foundation, in which case no more than £10.
2015 has prompted me to do something that I've wanted to do for a long time: Start a little style/beauty/fashion-type blog! Hopefully I'll keep this updated as best as I can!
A little bit of back-story & style recaps from the past lot of years. I'm sure I've missed out quite a few different looks, all with varying degrees of success!
I started modelling back when I was 16, (which is a loooooooooooong time ago now) within the alternative genres. When I first started out, I was going through that awkward, teen goth phase. (You know the one?) Learning to apply makeup through covering most of my face in liquid eyeliner patterns (not very well I may add), and spending an obscene amount on money on beautiful Gothic and Victorian style clothing.
(c) Always Photography
At that time, I thought I would be Goth, specifically in this style, forever! (I'm sure I'm not the only one that thought so!)
Fast forward a year and a half, till at 17 I moved to Germany to work. Whilst there, I fell in love with Cyber Goth/Industrial style, shaved off my eyebrows and looked like this for the next half year or so:
Turning 18, I decided it was time to look more professional since I had finished school & was looking for work before starting college. I decided to try out being blonde and "normal".
Once I went back to college to study art, I ended up reaching for the hairdye, and the eyebrows that I'd just grown back came off again. This was the result at 19.
(c) Veles Photography
At/20, I went back to basics temporarily, leaving Goth behind....then went emo/scene...ish.
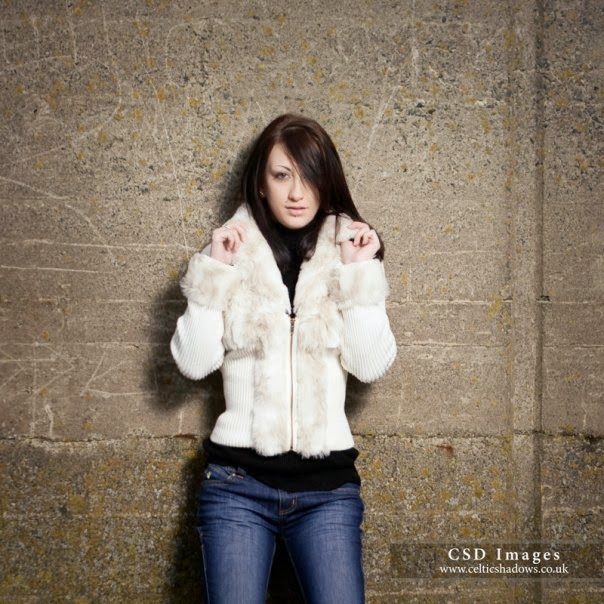
(c)CSD_Images
(c) Burfly
So then, at 21, with my modelling wardrobes starting to become packed full of so many styles of alternative clothing, I decided I wanted to be a Glamour girl ...(Bearing in mind, I'm not blessed with the typical glamour body-type, nor look!)
(c) Grime&Glamour
Then in the same year, I decided to go back to Goth, then followed by Pin-up/Burlesque. (are you keeping up?)
(c)CSD_Images for both
And then, 2012 happened!
2012 was the year where I started to really experiment with looks & makeup. (All makeup that you're seeing on these images is done by myself)
I spent a lot of time teaching myself how to properly apply makeup to a decent standard, and just couldn't settle on a style for my day to day, non modelling life!
As a model, esp someone vertically and aesthetically challenged like me, versatility and being able to produce different looks is extremely advantageous - no-one likes a one trick pony! Competing with the other models, I had to make myself stand out: which is where my makeup skills came into play.
2012 was also the year that I fell in love with Japanese fashion and Culture again. I was a really big anime & manga fan as a kid, until I found the alternative/gothic scene & music.
By chance, I came across a link on Tumblr to an anime called KissXsis and got a bit of a shock upon watching it! (I didn't know what it was about, until I watched it....oops!)
After that, I decided to re-visit my childhood favourites, Sailor Moon & Escaflowne. That then brought me back to the OSTs, then that followed on to FFX OST, which brought me to The GazettE, D, Kiryu etc. (Visual Kei)
Seeing these bands PVs, I was so attracted to their style, so chose to Emulate them to a degree, then add my own flair. (I also made makeup videos to go with it - see my channel here)
So, here is a roundup of images from 2012:
2013 turned out to be another year of playing the "Who do I want to be?" game. Wigs became daily worn items, and I couldn't look the same 2 days in a row, without feeling out of place for wherever I was going.
The trouble with being a "Style Chameleon", is that I constantly feel out-of-place when I go somewhere. I walk down the street dressed one way, spot a few people in a different style and desperately wish I'd went for that look instead. It's a never ending battle with myself!
To begin 2013, I looked like this, generally:
...and then, I broke out the bleach and became Holy Orange - Firehead!
Now this, I absolutely ADORED! I kept my hair this shade for nearly a year...which was pretty good going as I get bored all too easy.
Then, boredom & new fashion obsessions set in....yet again.
Kicking off 2014, I decided on Hime Gyaru/Lolita style...or so I thought.
In 2014 I launched my own business making accessories for kawaii & bridal styles, and started on the path of becoming a Tattoo Artist. (I know, once again, the chameleon strikes! On one side kawaii, then bridal, then all the way across to the other: tattooing. I'm sure for those of you who have managed to keep reading, you're all thinking; "Is this girl for real?No way!" but the answer is yes, I really cannot hold down one specific style! One day, it'll all come together and be utterly fabulous, I'm sure. )
After this spell, I did settle on Gyaru style makeup...for the most part. I decided that I wanted to be a pastel girl, then slightly Rokku (I don't even know where that came from...suspected brain-fart)
Then I took a more "Oooooh lets do some Avant Garde stuff" approach towards the end of the year:
.....and now we get to 2015!
Phew! >.< That was quite a journey, right?
Once again, I got bored with the current styles, and hair colours...wigs just wouldn't cut it anymore!
So, the hair was chopped and dyed, the style once again developed.
This is my current look! *Drumroll*
It's a lot different from the Unicorn hair! I'm not ready to fully let go of the pastel hair just yet, so when it came to dyed my extensions, I decided to make them ombre, so that I'd still have a little Unicorn magic left!
In my next post, I'm going to talk about my 2015 look, and go through the makeup look with everyone in detail - a youtube tutorial should be ready by this time next week, so please stick around for that!


 This prompted my usual thoughts of "ahh another bb cream/tinted moisturiser that claims to be light, but I end up looking orange anyway." but never-the-less, I figured that if anything, I could laugh if I ended up looking much like David Dickinson!